DIY Vintage Map Table – A Thrifted Table’s Stunning Glow-Up
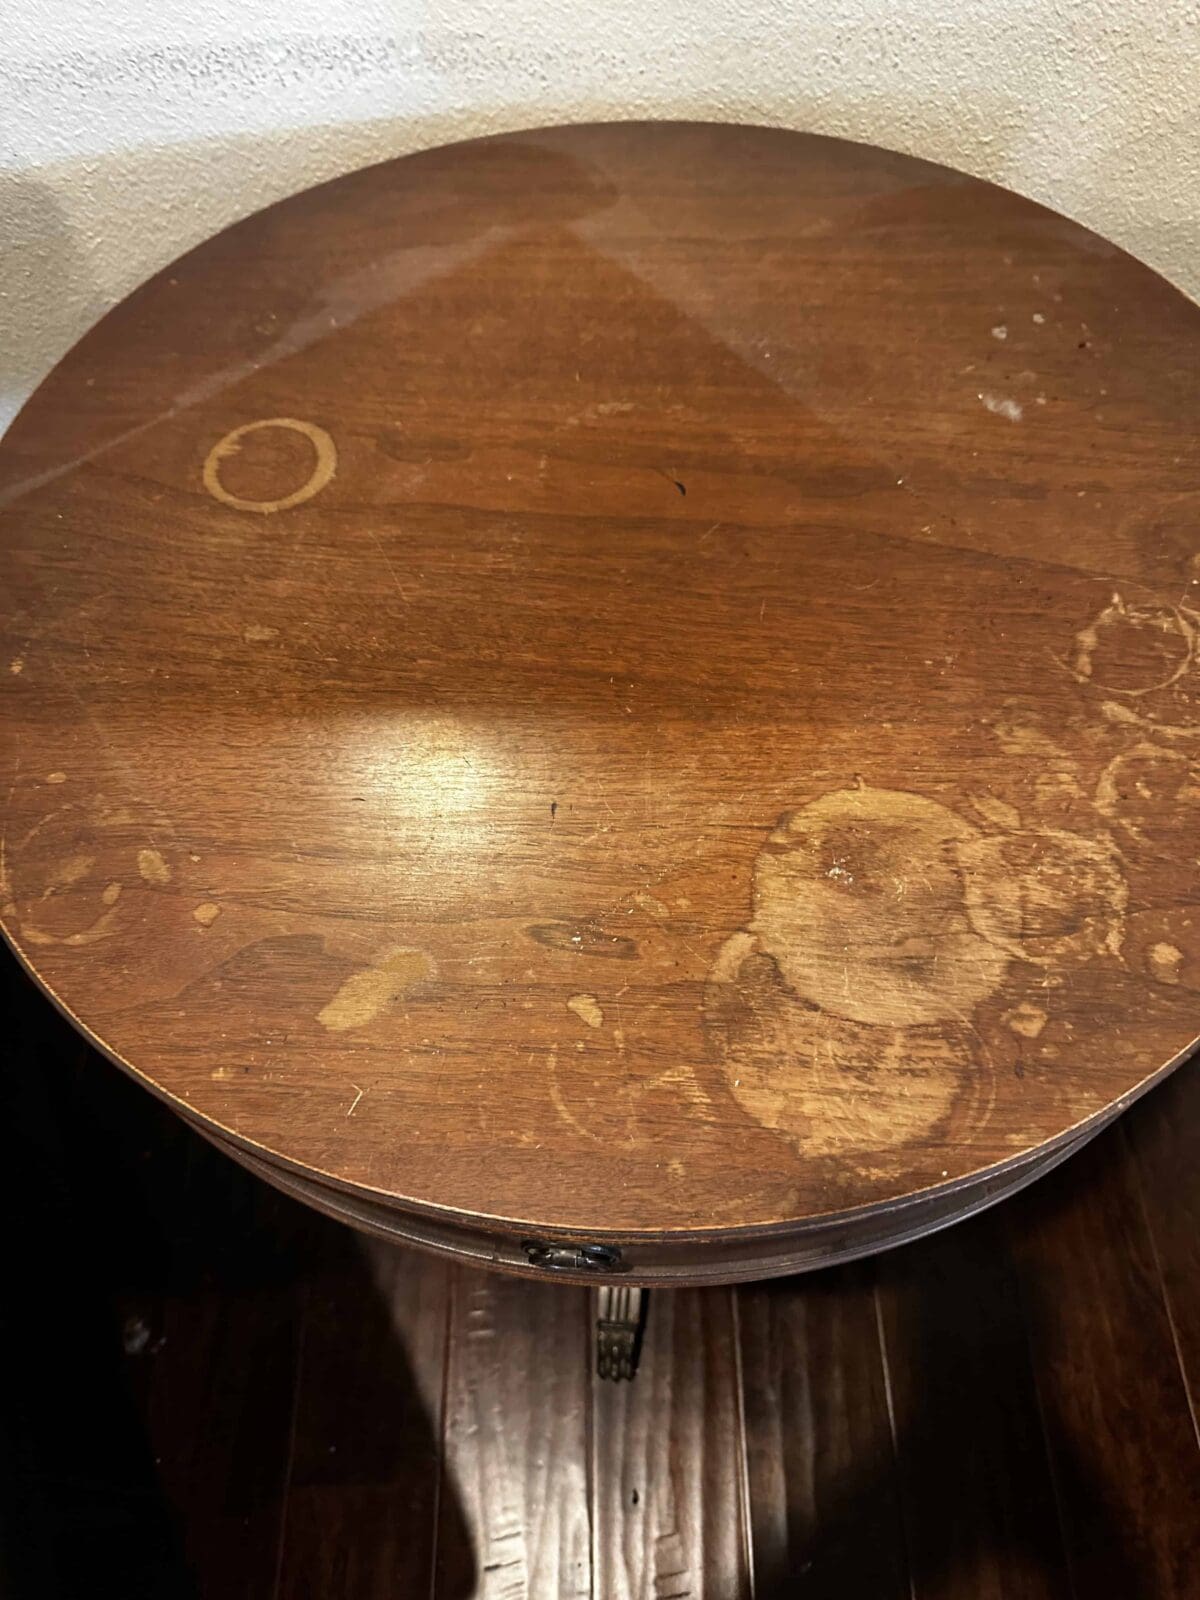
This little $8 thrifted table had seen better days. When I first brought it home, it was already scratched and worn, but I needed something to sit between our leather chairs—a spot for a lamp and our morning cups of coffee. At the time, I didn’t bother refinishing it properly, and over the months, life happened: water rings, scuffs, and a few too many coaster-less moments left the stained top looking even sadder.
Here’s the thing—I loved the aged patina of the wood stain on the legs and sides. The chippy, timeworn look fit perfectly with my vintage decor, and I didn’t want to lose that charm by painting the whole thing. But the top? It was beyond saving. Then, while browsing Hobby Lobby’s half-off wall art section, I spotted a gorgeous canvas map—and instantly knew it was the perfect solution!

This post may include affiliate links; you can read my disclosure policy here.
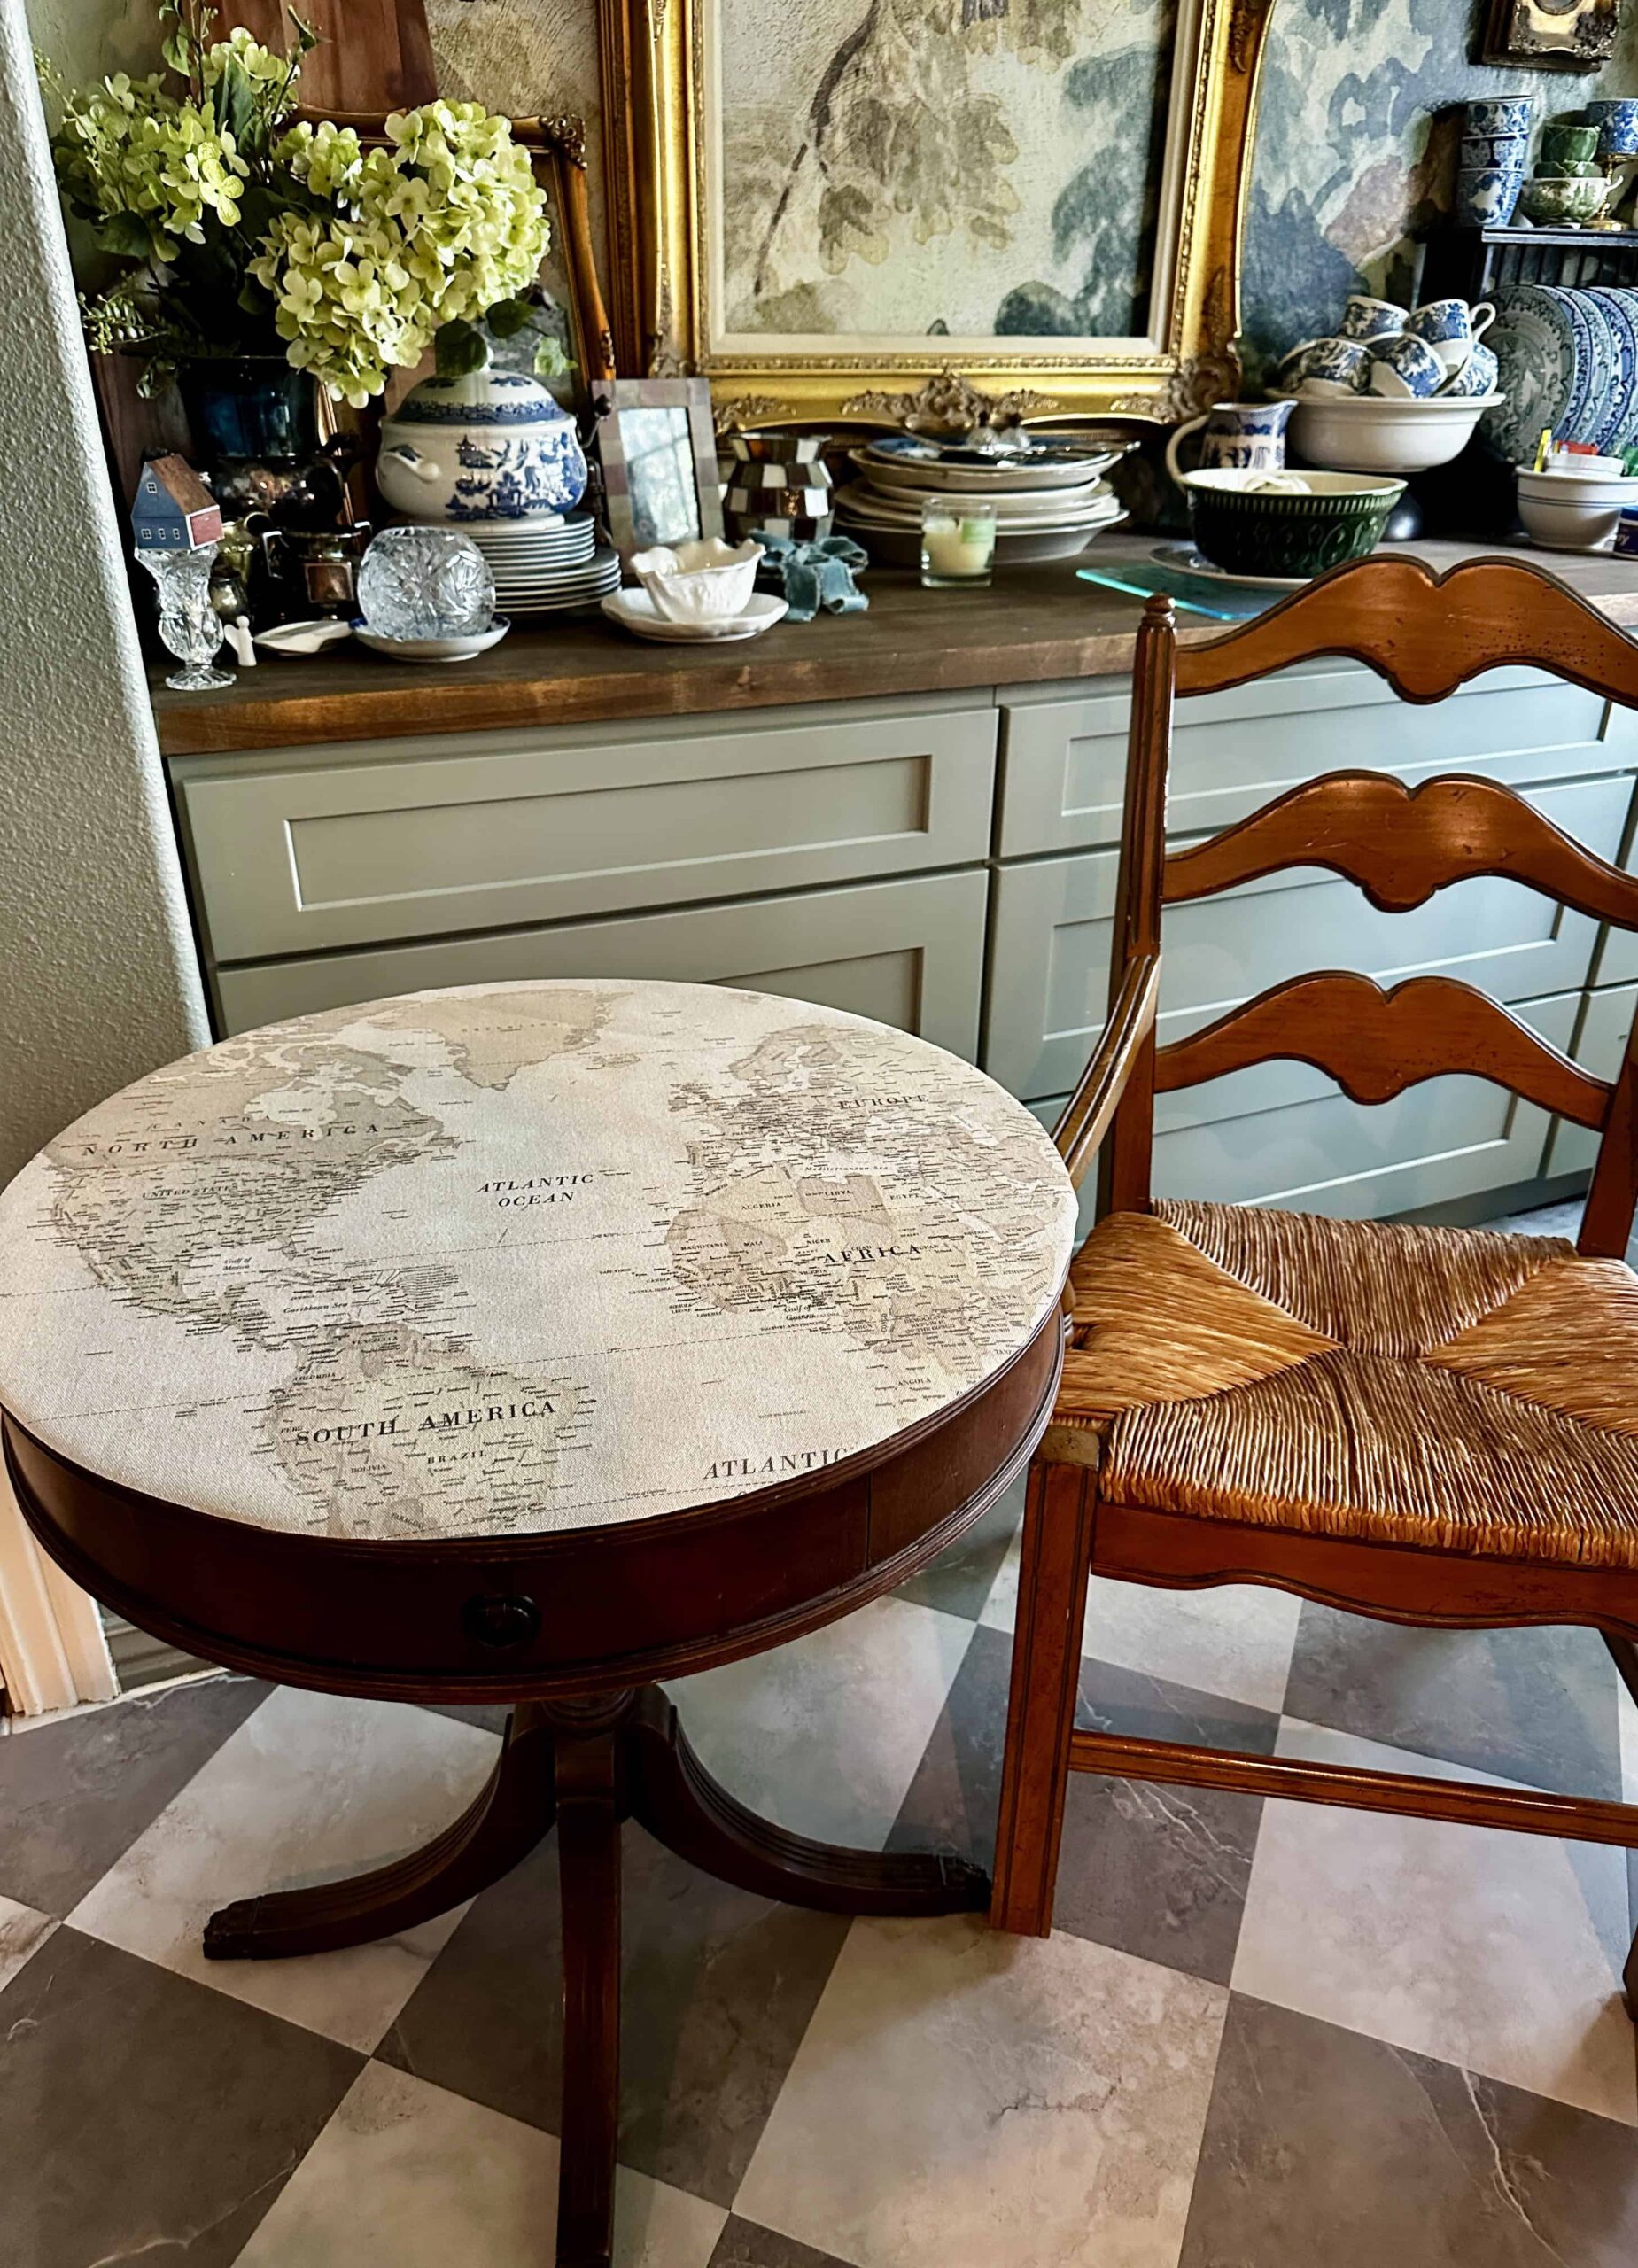
By decoupaging the map onto the damaged tabletop, I gave it a whole new life without covering up the parts I adored. Now, it’s a functional, conversation-starting piece that blends seamlessly with the rest of my home. The best part? This makeover took less than an afternoon and cost barely anything. Here’s how you can do it too!

Easy DIY Map Table Tutorial: Step-by-Step
1. Prep the Table Top
First, I gave the table a good cleaning—no fancy products needed! I just used a damp cloth and dawn dish soap to wipe away dust and grime, then let it dry completely.
2. Choose & Cut the Map
I laid the Hobby Lobby canvas map face-up and placed the table upside down on top of it. Using a pencil, I traced the tabletop’s shape directly onto the canvas.
3. Secure
While the table was still upside down, I tightened any loose screws in the legs or frame—since it was already flipped, why not?
4. Adhere with Gorilla Spray Glue
After cutting out the traced shape, I laid it face-up on the table to double-check the fit. Then, I flipped it over again and applied a light, even coat of Gorilla Spray Adhesive to the back—this stuff is strong, so work in a well-ventilated area! I carefully pressed the map onto the tabletop, starting at one edge and smoothing it outward with my hands to avoid wrinkles or bubbles.
5. Protect
Once the glue dried (about 30 minutes), I sealed the map with Rust-Oleum Clear Satin Spray for a durable, low-sheen finish. Two light coats did the trick!


5. Style & Enjoy!
After letting it cure overnight, my “new” table was ready! The map’s colors popped against the original stained base, and the satin finish protected it from future drink spills. Total cost: under $40 and barely an afternoon’s work.

What I’m Loving Now

Psst… Love map-themed decor?
This month, my creative friends in The Handcrafted Society are sharing their own map-inspired makeovers! Be sure to check out their projects (linked below) for more wanderlust-worthy DIYs. (We swap thrifty transformations every month—come join the fun!)


You Might Also Like
Amy, I love that you found a canvas map. The texture looks gorgeous on that rich base of your table. What a great find and upcycle project.
Thank you Tammy! I new it would be perfect for this little table!
Hi Amy! What an amazing transformation! Your new map table is gorgeous and looks amazing in front of your beautifully styled buffet. Pinned!
Thanks Missy! I love how it turned out too!
Hi Amy! What an incredible transformation! I can’t believe you got that table for only eight dollars. What a fabulous find! The colors of your map go perfectly with it! I know you’ll enjoy it for years to come!
Donna it was a little beat up but so worth it! I am so glad I didn’t leave it behind.
That is brilliant Amy! Such a creative way to save the best partsss of your table and renew the “bad” part.
I love the patina on the wood parts and cute little brass feet! It turned out perfect!
What an incredible makeover, Amy! You found the perfect piece in need of a little love and transformed it into a true masterpiece. Your talent and eye for design are just amazing!
Thanks Wendy! You’re so sweet!
Amy – You’re project is super cute! I love it –
Thanks Lynn!
Wow Amy your table has a whole new personality! Love the old world feel of it! Pinning!
Thanks Michelle! It really does have a new attitude! LOL
Amy – Genius! I would never have thought to use a canvas map to decoupage a table top. Such a smart and practical idea. Your table looks great! Thanks for all the tips and inspiration.