
Chinoiserie Chic: Decoupage Dollar Tree Glass Plates with Fabric Remnants
Hey there, friend! I’m so excited to share a fun, budget-friendly DIY that combines my love for Chinoiserie decor and upcycling.
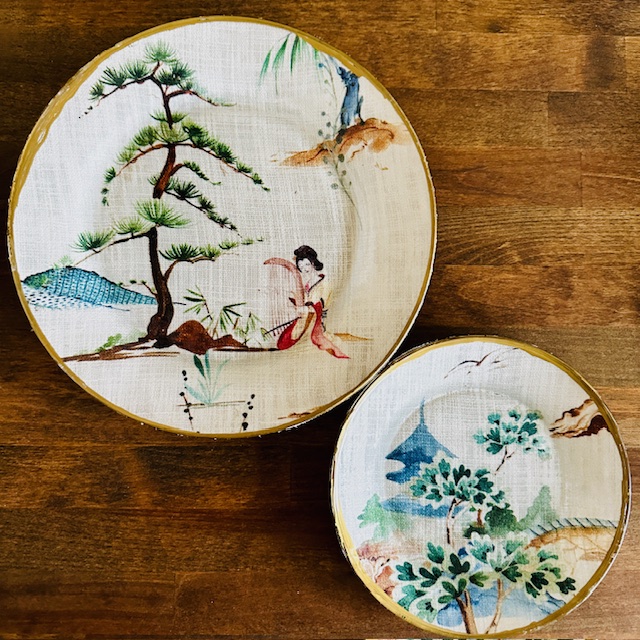
Today, we’re turning plain old Dollar Tree glass plates into stunning Chinoiserie-inspired masterpieces using fabric remnants.
Also, my friends have all shared how to do a fun project with glass and I have linked them all at the bottom of this post for you!
What is Chinoiserie, Anyway?
Before we get our hands messy (in the best way possible), let’s talk about Chinoiserie. This gorgeous design style is all about European interpretations of Asian art, and it’s been a decor favorite for centuries. Think lush florals, exotic birds, pagodas, and intricate patterns that feel both luxurious and whimsical.
You can read about Blue Willow China: The Pattern That Tells a Thousand-Year-Old Love Story I have collected this pattern for many years and I loved learning the story about it!
Why do I love it? Because it’s timeless, versatile, and adds instant sophistication to any space. Whether you’re going for a full-blown Chinoiserie vibe or just want to sprinkle in a few accents, this style works wonders.

This post may include affiliate links; you can read my disclosure policy here.
Why Fabric Remnants for Decoupage?
Now, you might be wondering, “Why fabric? Isn’t decoupage usually done with paper?” Great question! Here’s why I’m obsessed with using fabric remnants for this project:
- Eco-Friendly: Using fabric scraps is a fantastic way to reduce waste and give new life to materials you already have.
- Budget-Friendly: Fabric remnants are often sold at a fraction of the cost, and if you’re like me, you probably have a stash of leftover fabric just waiting to be used.
- Unique Texture: Fabric adds a lovely texture and depth that paper just can’t match. Plus, it’s surprisingly easy to work with!
- Sales: You can find beautiful fabric remnants on sale very inexpensively at high-end fabric stores! That’s what I did here. This fabric is very expensive but I got a small remnant with the important images for $3 at a high-end furniture store.
Supplies
Ready to get started? Here’s your shopping and supply list:
- Dollar Tree glass plates (the star of the show!)
- Fabric remnants (look for Chinoiserie patterns or anything with florals, birds, or intricate designs)
- Mod Podge or your favorite decoupage glue
- Foam brush (for smooth application)
- Scissors (to trim your fabric)
- Gold Paint Pen (For the Rim)
- Rubbing Alcohol (to clean the glass plates)
- Dollar Tree Glass candlestick (if you want a tiered plate)
Pro Tip: If you don’t have fabric remnants on hand, check out your local craft store’s clearance section or even raid your scrap bin. You’d be surprised at what you can create with what you already own!


Step-by-Step Tutorial
Alright, let’s go! Follow these easy steps to create your own Chinoiserie chic plates:
Step 1: Prep Your Plates
Start by giving your Dollar Tree glass plates a good cleaning with rubbing alcohol. You want them to be free of dust and fingerprints so the fabric adheres smoothly. Dry them thoroughly before moving on.
Step 2: Line up your fabric
Lay your fabric out and decide which part you’d like to use on your plates if you have a pattern like I do.
Step 3: Cut Your Fabric
Measure your fabric remnants against the plate and cut them to size. I like to leave at least 2 inches of extra around the edges to ensure full coverage. I used a pencil to trace a line. Then cut.


Step 3: Apply a Line of Gold around the Plate
I used a gold UNI paint marker to line the plate with a gold rim. This hides any rough edges of the fabric that will show through the glass plate. Mine wasn’t as neat as I would have liked but I think it is charming!


Step 3: Apply Mod Podge
Using your foam brush, apply a thin, even layer of Mod Podge to the back of the plate. Don’t go too thick—just enough to hold the fabric in place.
Step 4: Adhere the Fabric
Carefully place your fabric onto the plate, starting from the center and smoothing it out toward the edges. Use your fingers to gently press out any air bubbles or wrinkles.
Step 5: Trim the edge
Use your scissors to cut as close to the plate as possible and trim the edges around the plate. Do this before you seal the fabric down but after it’s affixed with mod podge initially.
Step 6: Seal the Design
Once the fabric is in place, apply another layer of Mod Podge over the top to seal it. This will protect your design and give it a finished look. Let it dry completely—patience is key here!


Step 7: Let It Cure
Allow your plates to dry and cure for at least 24 hours. If you want extra durability, you can spray them with a clear acrylic sealer.

Tips for Success
- Choose Lightweight Fabric: Heavier fabrics can be tricky to work with, so stick to lightweight cotton or linen for the best results.
- Smooth Out Bubbles: Take your time smoothing out the fabric to avoid air bubbles. Your hands/fingers work wonders for this!
- Experiment with Patterns: Don’t be afraid to mix and match fabrics for a unique, eclectic look.
How to Style Your Chinoiserie Plates

Now that your plates are ready, it’s time to show them off! Here are a few ideas:
- Wall Art: Create a stunning gallery wall by grouping several plates together. It’s an instant conversation starter!
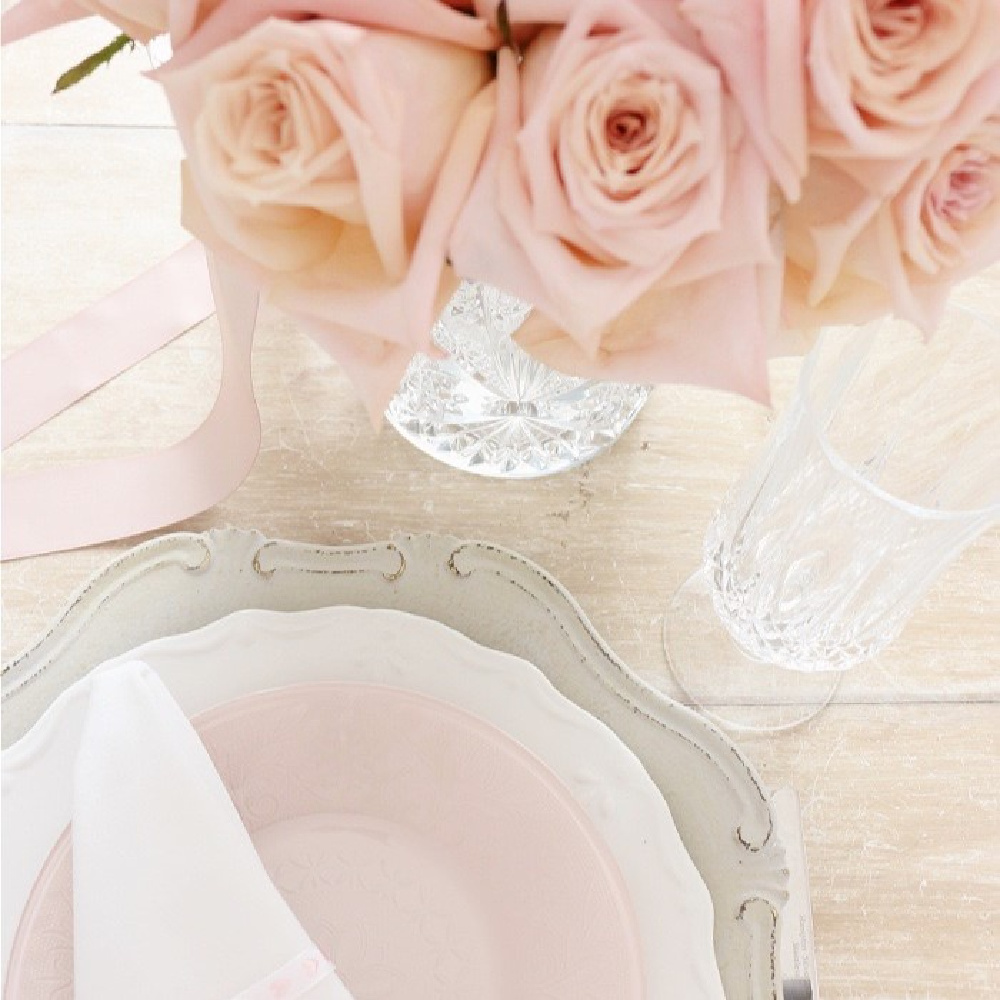
- Table Decor: Use your plates as chargers or decorative accents for a Chinoiserie-inspired tablescape.
- Gift Giving: These make such thoughtful, personalized gifts. Who wouldn’t love a handmade piece of art?
I hope you’re as excited about this project as I am! It’s such a fun and easy way to bring a touch of Chinoiserie chic into your home while staying budget-friendly and eco-conscious. Plus, it’s a great way to use up those fabric remnants you’ve been hoarding (no judgment here—I do it too!).
If you give this DIY a try, I’d love to see your creations! Email me your pictures at amy@amysadlerdesigns.com and leave me a comment below! I would love that so much!
XOXO,
Amy


These plates are fantastic. Love your tips for success. Your idea of edging the plates with gold paint is also a great tip. Happy almost spring Amy.
Thank you Anna. I need to slow down a little bit when I am edging but I loved the look of the gold rim too!
These plates are so cool, Amy, I love how they can be used in so many different ways too. Sometimes I find the prettiest pieces of vintage fabric but the scraps are usually too small for a pillow so I pass them but I’m definitely going to bring them home now. Hugs, CoCo
Thank you CoCo. I think I need to paint some plates to match like yours! Definitely don’t leave behind the pretty but small remnants! Lots of fun things to use them for!
Oh, I love these, Amy! The fabric is just perfect, and I love the gold rim accent! Just beautiful!
Thank you Kim. I loved the fabric and I didn’t have the heart to leave it at the store! LOL
Truly lovely Amy! And so perfect in your dining room. You’re so right about textiles bringing depth that paper just can’t match.
Thank you Diane. The fabric was too pretty to leave behind!
Such a great idea. I would have never thought to use fabric. This project has a special place in my heart as I was with you when you found that beautiful fabric remnant. I wish I would have spent more time looking through it like you did.
Yeah, maybe a little too much time I spent up there! LOL I am so glad we got to spend time together!
Amy, beautiful idea with the Chinoiserie fabric. I am a huge fan of Chinoiserie. My granddaughter, Madi would love your fabric choice. It’s a beautiful tiered stand.
Amy, the Chinoiserie fabric for this project is gorgeous! I love the little detail of the gold trim on the plates too. So classic!!
So pretty, Amy! I just love the fabric. It’s amazing the crafts we can find to use our extra fabric scraps on!
Hi Amy! Your plates turned out so pretty! I adore how you added the gold rim around the edge! I have never decoupaged with fabric, but I want to try it now! Guess who’s heading to Dollar Tree! Pinning now!
Love, love, love this project! I am a huge chinoiserie fan and these plates are drop dead gorgeous! Using fabric gives the plate a beautiful texture that retains the character of the fabric. Definitely trying this! Pinned!
The plates are beautiful Amy! Love that you used fabric!